Wall Stud Spacing & Plate Layout Guide
Laying out wall studs is the foundational skill of residential framing. Correctly pulling your tape measure ensures that every 4-foot and 8-foot sheet of drywall lands exactly on the center of a stud face. Calculate your exact stud list with our interactive framing calculator.
Quick Key Takeaways
- ✓15-1/4" First Mark: Pulling 15-1/4" offsets the 3/4" stud half-thickness so Stud #2 centers at 16.0".
- ✓Clamp Plates Together: Always square-scribe top and sole plates together to guarantee plumb studs.
- ✓Drywall Breaks: At 48", 96", 144", and 192", each sheet shares 3/4" of solid wood nailing surface.
- ✓Mark the "X": Scribe your pencil line and draw an "X" on the right so stud placement never wanders.
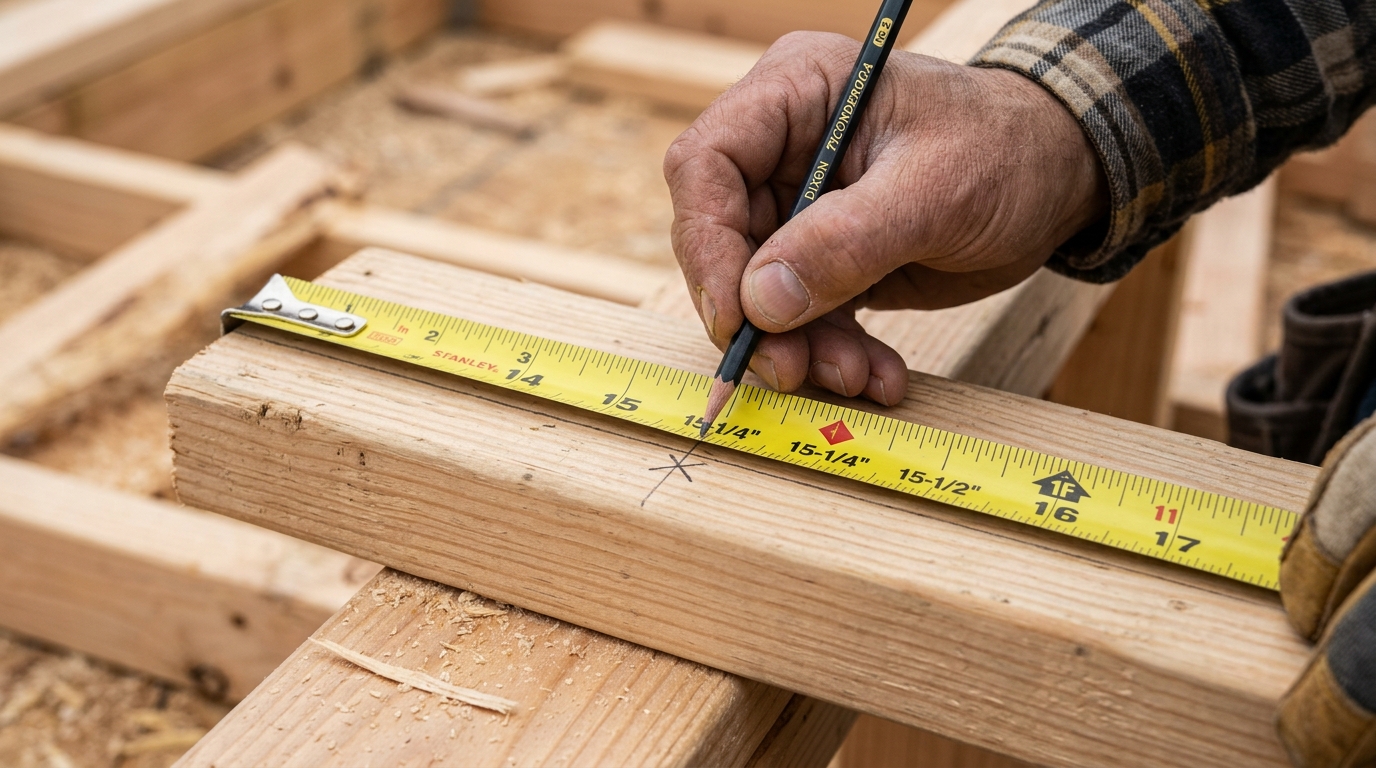
The First Stud Offset in Action
Subtracting 3/4" (half of a 1.5" stud) from 16" yields 15-1/4". Scribing the line and placing the stud on the "X" centers stud #2 at exactly 16.0".
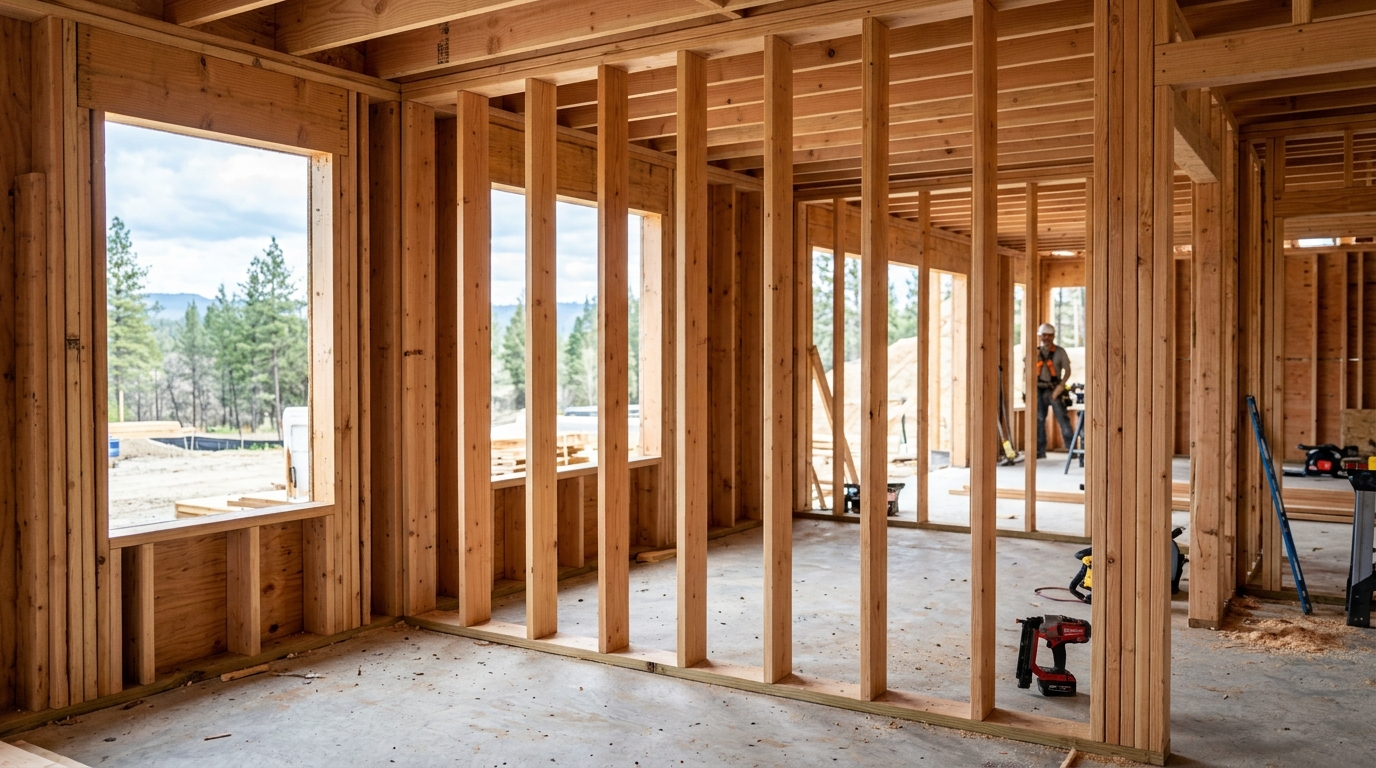
Full Framing Geometry
Vertical Douglas fir 2x4 studs nailed between the bottom sole plate and double top plate create 14.5" clear cavities for fiberglass batt insulation.
The 15-1/4" First Stud Offset Rule Explained
The most common rookie framing error is hooking a tape measure on the end of a wall plate and marking the first intermediate stud at 16 inches. If you do this, your drywall sheets will fail to land on studs.
Here is why: The starter stud sits flush with the end of the plate (occupying 0" to 1.5").
When you hang a 48-inch (4 ft) sheet of drywall from that starting corner, its opposite edge will land at exactly 48.0 inches.
To give that 48" drywall edge 3/4 inch of solid nailing backing, the stud at 48" must have its centerline at 48.0", and its left edge at 47-1/4" (48" - 0.75").
Therefore, every stud mark pulled from the edge must be offset 3/4 inch to the left:
Master 16" On-Center Tape Measure Layout Schedule
Pull your tape measure from the wall edge and mark these exact numbers along your plates:
| Stud # | Tape Layout Mark (Pencil Line) | Resulting Centerline | Drywall & Sheathing Notes |
|---|---|---|---|
| 1 | 0" (Flush) | 0.75" | Starter Stud (Flush with edge) |
| 2 | 15-1/4" | 16.0" | 3/4" Offset (First Intermediate) |
| 3 | 31-1/4" | 32.0" | Common Stud |
| 4 | 47-1/4" | 48.0" | ★ 48" (4 ft) Drywall Seam (Center Bearing) |
| 5 | 63-1/4" | 64.0" | Common Stud |
| 6 | 79-1/4" | 80.0" | Common Stud |
| 7 | 95-1/4" | 96.0" | ★ 96" (8 ft) Drywall / Sheathing Seam |
| 8 | 111-1/4" | 112.0" | Common Stud |
| 9 | 127-1/4" | 128.0" | Common Stud |
| 10 | 143-1/4" | 144.0" | ★ 144" (12 ft) Drywall Seam |
| 11 | 159-1/4" | 160.0" | Common Stud |
| 12 | 175-1/4" | 176.0" | Common Stud |
| 13 | 191-1/4" | 192.0" | ★ 192" (16 ft) Drywall Seam |
24" On-Center Tape Measure Layout Schedule (23-1/4" Offset)
For non-bearing interior partitions and 2x6 exterior walls under advanced framing codes:
| Stud # | Tape Layout Mark (Pencil Line) | Resulting Centerline | Drywall & Sheathing Notes |
|---|---|---|---|
| 1 | 0" (Flush) | 0.75" | Starter Stud (Flush with edge) |
| 2 | 23-1/4" | 24.0" | 3/4" Offset (First Intermediate) |
| 3 | 47-1/4" | 48.0" | ★ 48" (4 ft) Drywall Seam (Center Bearing) |
| 4 | 71-1/4" | 72.0" | Common Stud |
| 5 | 95-1/4" | 96.0" | ★ 96" (8 ft) Drywall / Sheathing Seam |
| 6 | 119-1/4" | 120.0" | Common Stud |
| 7 | 143-1/4" | 144.0" | ★ 144" (12 ft) Drywall Seam |
| 8 | 167-1/4" | 168.0" | Common Stud |
| 9 | 191-1/4" | 192.0" | ★ 192" (16 ft) Drywall Seam |
4-Step Wall Plate Marking Procedure
Step 1: Cut Plates to Matching Length
Cut your bottom sole plate and the lower top plate to the exact identical wall length. If the wall is 12' 0", both boards must match within 1/16".
Step 2: Clamp Plates Edge-to-Edge
Place the two plates side-by-side on saw horses or a flat subfloor with their end cuts flush. Clamp them or tack them with a 8d duplex nail so they cannot slip during tape pulling.
Step 3: Pull Tape & Square Across Both Plates
Hook your tape on the left edge. Mark 15-1/4", 31-1/4", 47-1/4", 63-1/4", 79-1/4", 95-1/4". Using a speed square, scribe a sharp pencil line across BOTH plates simultaneously.
Step 4: Draw "X" Marks to the Right
Draw an "X" on the right side of every line. When assembling studs, nail the stud so its left edge touches the line and covers the "X".
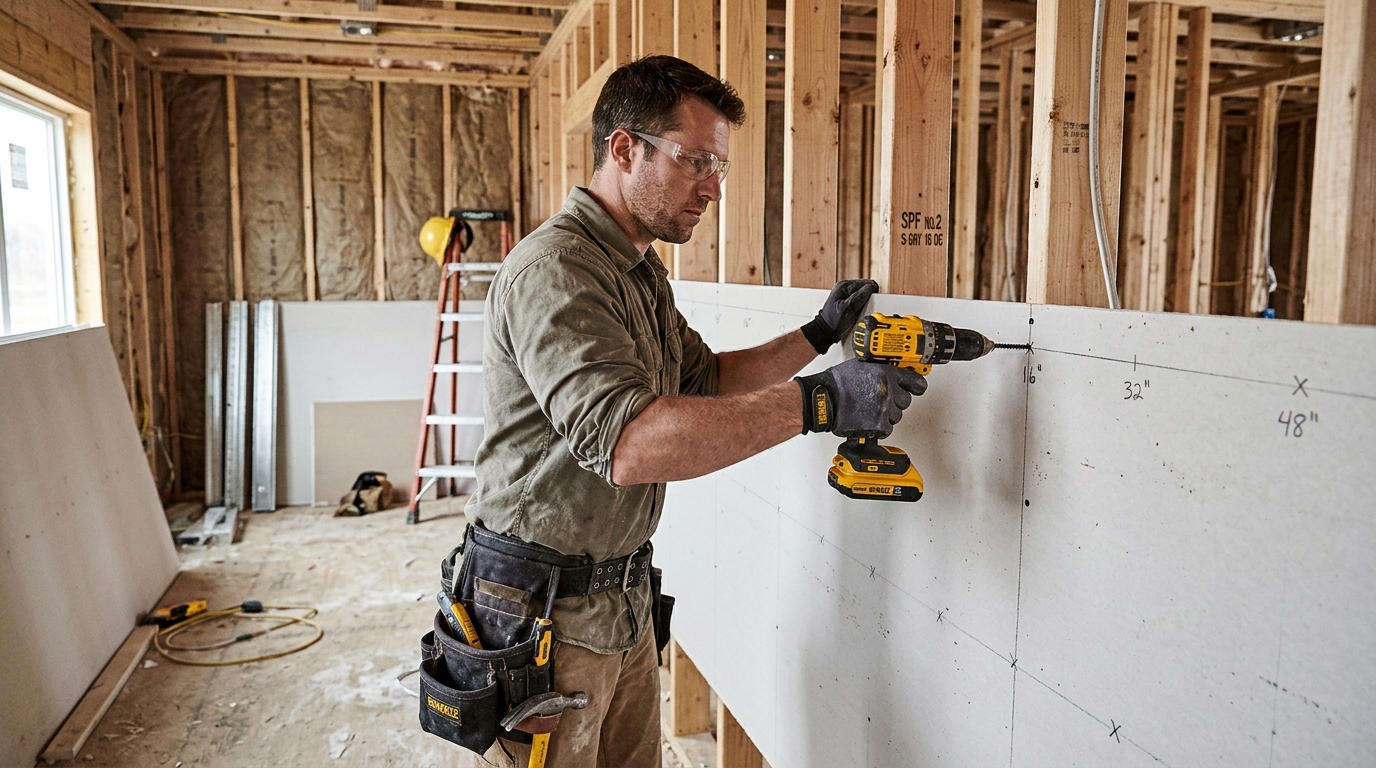
Drywall Edge Landing Guarantee
By maintaining the 15-1/4" offset, the edge of an 8-foot (96") sheet of drywall breaks squarely on the 3/4" centerline of stud #7, giving both sheets 3/4" of solid wood nailing flange.
Frequently Asked Questions
Quick, authoritative answers to common wood framing, building code, and stud spacing questions.